Baking thin cut chicken breasts tips for juicy results every time
As a busy parent, I know the challenge of making a healthy, tasty meal every night. Thin cut chicken breasts have been a game-changer for my family. They can be juicy and flavorful, making everyone want more.
I used to worry about cooking chicken breasts, fearing they’d be dry and tasteless. But learning to thin slice and bake them right changed everything. Now, I make tender, delicious chicken for dinners and meal prep. I’m excited to share my tips with you, so you can enjoy the same tasty results at home.
Table of Contents
Understanding the Benefits of Thin Cut Chicken Breasts
Thin cut chicken breasts are great for busy cooks. They are easy to use and always taste good. This makes them a top pick for anyone who wants tasty chicken.
Why Thin Slices Are Better for Even Cooking
These chicken cutlets cook evenly, avoiding dry spots. They are usually 1/2 to 1 inch thick. This means they cook fast and stay moist, making them perfect every time.
Portion Control and Quick Cooking Advantages
Thin cut chicken breasts are perfect for controlling portions and cooking fast. A 4-ounce serving has 110-140 calories. They cook in 15-20 minutes at 400°F (200°C), saving time on busy nights.
Enhanced Flavor Absorption Benefits
Thin sliced chicken breasts absorb flavors better. They can take in the taste of rubs or marinades well. This makes the chicken taste even better.
Thin cut chicken breasts are great for meal prep and many recipes. They offer even cooking, easy portion control, and better flavor. Try them for juicy, flavorful chicken every time.
Essential Kitchen Tools and Equipment for Perfect Results
For baking delicious thin cut chicken breasts, the right tools are crucial. They help with everything from slicing to checking for doneness. These items are essential for great results every time.
A sharp meat thermometer is a must. It lets you check the chicken’s internal temperature. This ensures it reaches a safe 165°F. Without it, chicken can become dry and tough.
- A high-quality baking sheet with parchment paper or a silicone mat is great. It makes cleanup easy and helps with even heat.
- Sharp kitchen scissors are handy for cutting off excess fat or skin. This makes the chicken look better and taste better too.
- A sharp knife is key for slicing the chicken into thin, even pieces. This is important for even cooking.
- A silicone basting brush helps spread marinades, oils, or seasonings evenly. This boosts the chicken’s flavor and texture.
- Long-handled tongs are perfect for handling hot chicken safely. They prevent burns.
With these tools, you’ll get perfectly cooked, juicy, and flavorful chicken breasts every time.
The Art of Slicing Chicken Breasts Properly
Slicing chicken breasts thinly is an art that can make your cooking better. Thin slices cook fast and evenly, keeping moisture in and flavors strong. Let’s look at how to make your butterfly chicken breasts thin and ready for great taste.
Proper Cutting Techniques
Start by pressing your hand on the chicken breast to keep it steady. Slice it horizontally from the thick end to the thin end. Try to make slices 1/4 to 1/2 inch thick for best results. If needed, use a meat mallet to pound the chicken and make it even.
Achieving Uniform Thickness
It’s important to have chicken slices of the same thickness for even cooking. After slicing, check each piece for thickness. Use a meat mallet to gently pound any thicker parts, without tearing the meat. This will make all slices the same thickness.
Safety Tips for Handling Raw Chicken
- Always wash your hands with soap and water before and after touching raw food safety chicken.
- Use different cutting boards for raw meat and veggies to avoid contamination.
- Clean all surfaces that touched raw chicken to keep food safe.
Learning to slice chicken breasts well opens up a world of tasty and juicy dishes. Always follow food safety rules. Your thin-sliced butterfly chicken will be a favorite every time.
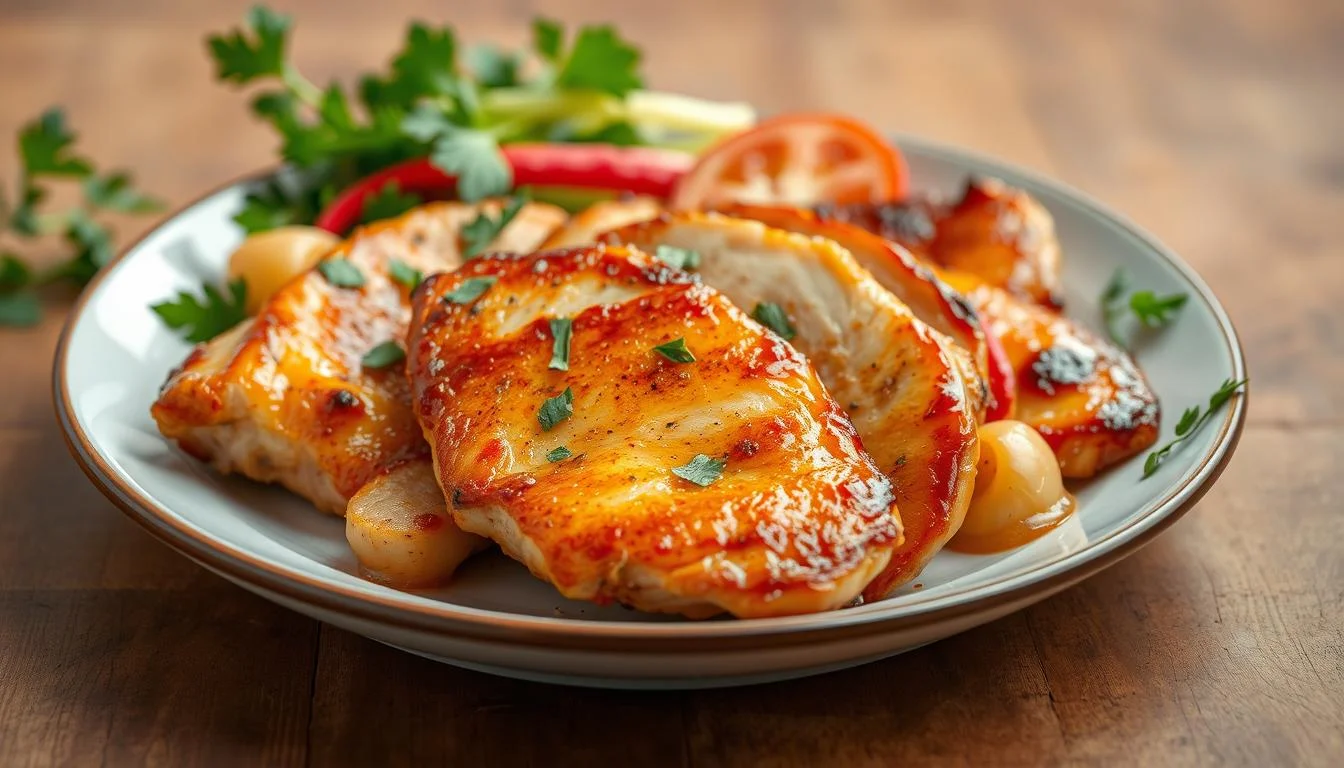
Baking Thin Cut Chicken Breast: Temperature and Timing Guide
Getting juicy and flavorful thin cut chicken breasts in the oven is all about the right temperature and timing. Follow these tips for the best results:
Preheat your oven to 450°F for the best results. This high heat seals in moisture and gives a golden-brown look. Bake the thin chicken breasts for 10-12 minutes at this temperature. For a lower heat, try 375°F for 12-15 minutes or 350°F for 15-20 minutes.
The internal temperature of 165°F is key to doneness, as checked with a meat thermometer. This ensures the chicken is cooked without drying out. Adjust the baking time based on the chicken’s thickness and your oven’s quirks.
Thin cut chicken breasts cook quickly, so watch them closely to avoid overcooking. Letting the chicken rest for 5-10 minutes after baking makes it even more moist and flavorful.
“Baking thin chicken breasts at the right temperature and time is crucial for juicy, tender results every single time.”
With this guide, you can bake thin cut chicken breasts perfectly. Enjoy the benefits of this healthy protein with your favorite seasonings and sides for a tasty meal.
Perfect Marinades and Seasonings for Maximum Flavor
Boosting the taste of your baked thin cut chicken breasts is easy. Just pick the right marinade and seasoning blends. Marinating your chicken for at least 15 minutes, or up to 48 hours, makes it juicy and tender. This way, you get delicious results every time.
Basic Seasoning Combinations
Begin with these simple yet tasty seasoning blends. They add depth and character to your chicken:
- Classic Blend: Salt, pepper, garlic powder, paprika
- Mexican Flair: Chili powder, cumin, oregano
- Italian Herbs: Basil, oregano, thyme
Marinade Time Requirements
For the best taste, marinate your chicken for at least 15 minutes. Or, marinate it up to 48 hours for even more flavor. The longer it marinates, the more it absorbs the chicken marinade and flavor enhancers. Adding lemon juice or vinegar helps tenderize the meat too.
By following these steps, you’ll bring out the best in your thin cut chicken breasts. You’ll make dishes that wow your family and friends. Try different seasoning blends and marinades to find your favorite flavors.
The Importance of Proper Chicken Preparation
Proper preparation is key for juicy, flavorful thin-cut chicken breasts. Patting the chicken dry before seasoning and tenderizing through brining are crucial steps. These steps can greatly impact the final result.
Start by patting the chicken breasts dry with paper towels before seasoning. This helps the seasonings stick better and prevents steaming, which can make the chicken soggy. Also, bringing the chicken to room temperature before baking ensures it cooks evenly. This helps avoid dry, overcooked edges.
- Tenderize the chicken breasts by brining them in a saltwater solution for 15-30 minutes. This helps the meat stay moist and become tender during cooking.
- Use a fork to gently pierce the chicken. This allows marinades or seasonings to penetrate the meat for better flavor.
- Trim any excess fat from the chicken breasts. This promotes healthier cooking and prevents excessive browning or burning.
By properly preparing your thin-cut chicken breasts, you’ll get juicy, tender, and flavorful results. These simple techniques will make your chicken dishes even better.
“Proper chicken preparation is the foundation for achieving mouthwatering, perfectly cooked thin-cut breasts.”
Remember, paying attention to detail in the prep stage is crucial for baking thin-cut chicken breasts. With a bit of extra effort, you’ll create delicious and satisfying meals.

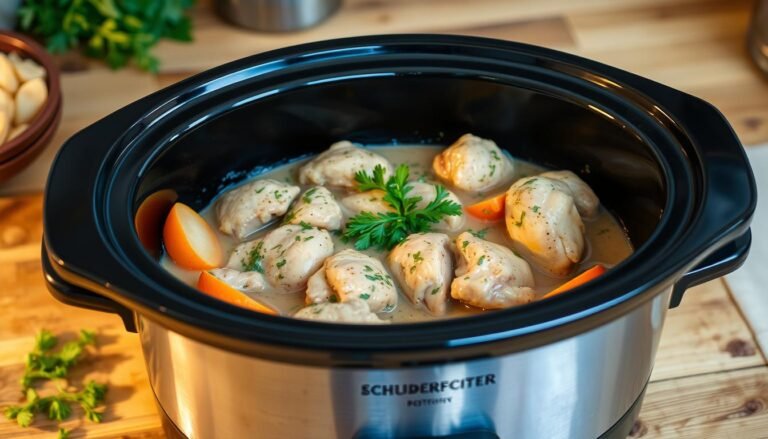
Secret Tips for Maintaining Moisture While Baking
Making juicy, tender chicken breasts is an art. It’s all about the right prep and baking methods. A simple brine solution is key to keeping meat moist.
Brining Methods
Soaking chicken in a brine for 15 minutes is magic. The saltwater keeps juices in, stopping the meat from drying out. Mix 4 cups of warm water with 1/4 cup of kosher salt for a quick brine.
Moisture Retention Techniques
Brining is just the start. Covering the dish with foil traps steam and keeps meat moist. Brushing with brine solution or oil before baking adds a moisture barrier.
Don’t overcook your chicken. Bake at 425°F until it hits 165°F. Then, let it rest for 5-10 minutes. This ensures juicy, flavorful chicken.
“The secret to perfectly moist baked chicken breasts lies in the preparation. Brining and proper cooking techniques make all the difference.”
With these tips, you’ll get restaurant-quality juicy chicken every time. Enjoy the tasty results of your hard work!
Best Practices for Oven Setup and Positioning
To bake thin cut chicken breasts perfectly, focus on oven setup and positioning. The right oven rack placement is key for even heat and cooking.
Place the oven rack in the middle for the best results. This spot lets heat spread evenly around the chicken. Use the convection setting if your oven has it. It makes the chicken juicier and tastier by circulating hot air.
Preheat the oven to about 425°F before baking. This creates a stable cooking environment for the oven rack position to work its magic.
- Put the thin cut chicken breasts on a baking sheet or oven-safe dish. Leave some space for convection baking and air flow.
- If one part of the pan cooks faster, rotate the pan halfway through. This ensures even browning and cooking.
By following these simple steps, you’ll get perfectly cooked, juicy thin cut chicken breasts every time.
| Oven Temperature | Baking Time | Internal Temperature |
|---|---|---|
| 425°F | 25-30 minutes | 165°F |

“Proper oven setup and positioning is key to ensuring even heat distribution and juicy, flavorful baked chicken breasts.”
How to Check for Doneness Without Drying Out
When baking thin-cut chicken breasts, it’s key to keep them juicy. Use a meat thermometer to check the internal temperature. This is better than just looking at the chicken.
Put the thermometer into the thickest part of the breast, away from the bone. The temperature should hit 165°F. This is the safe internal temperature for chicken. When you see this number, your chicken is done and ready to eat.
Don’t cut into the chicken to see if it’s done. This will let the juices out, making it dry. Instead, let the chicken rest for about 5 minutes before you serve it. This helps the juices spread evenly, making each bite moist and tasty.
By using a meat thermometer and letting the chicken rest, you’ll always have tender, juicy chicken breasts.
Conclusion
Baking thin cut chicken breasts is a quick and tasty way to get a healthy protein meal. Knowing the benefits of thin slices and using the right tools helps. Following the best practices for seasoning and oven setup ensures juicy, flavorful results.
Try different marinades and seasonings to make your juicy thin chicken dishes exciting. They’re great for quick dinner ideas or healthy protein meal prep.
Keep an eye on temperature and timing, as thin cut chicken breasts cook fast. Overcooking can make them dry. With practice, you’ll make tender, moist baked chicken everyone will enjoy.
Pair your juicy thin chicken with roasted veggies, fresh salads, or whole grain sides. This makes for a complete and satisfying meal.
Thin cut chicken breasts are convenient and versatile. They’re perfect for a quick dinner or adding more healthy protein to your diet. Baking thin sliced chicken is a great addition to your cooking routine.
FAQ
What are the benefits of thin cut chicken breasts?
What kitchen tools are essential for baking thin cut chicken breasts?
How do I properly slice chicken breasts?
What temperature and cooking time should I use for baking thin cut chicken breasts?
What are some good seasoning and marinade options for thin cut chicken breasts?
How can I ensure my thin cut chicken breasts stay moist and juicy?
How can I set up my oven for the best results when baking thin cut chicken breasts?
How can I check if my thin cut chicken breasts are fully cooked?
Leave a Comment & Rate this Recipe!
If you love this recipe, please consider giving it a star rating when you leave a comment. Star ratings help people discover my recipes online. Your support means a lot to me, I appreciate you.
There are no reviews yet. Be the first one to write one.