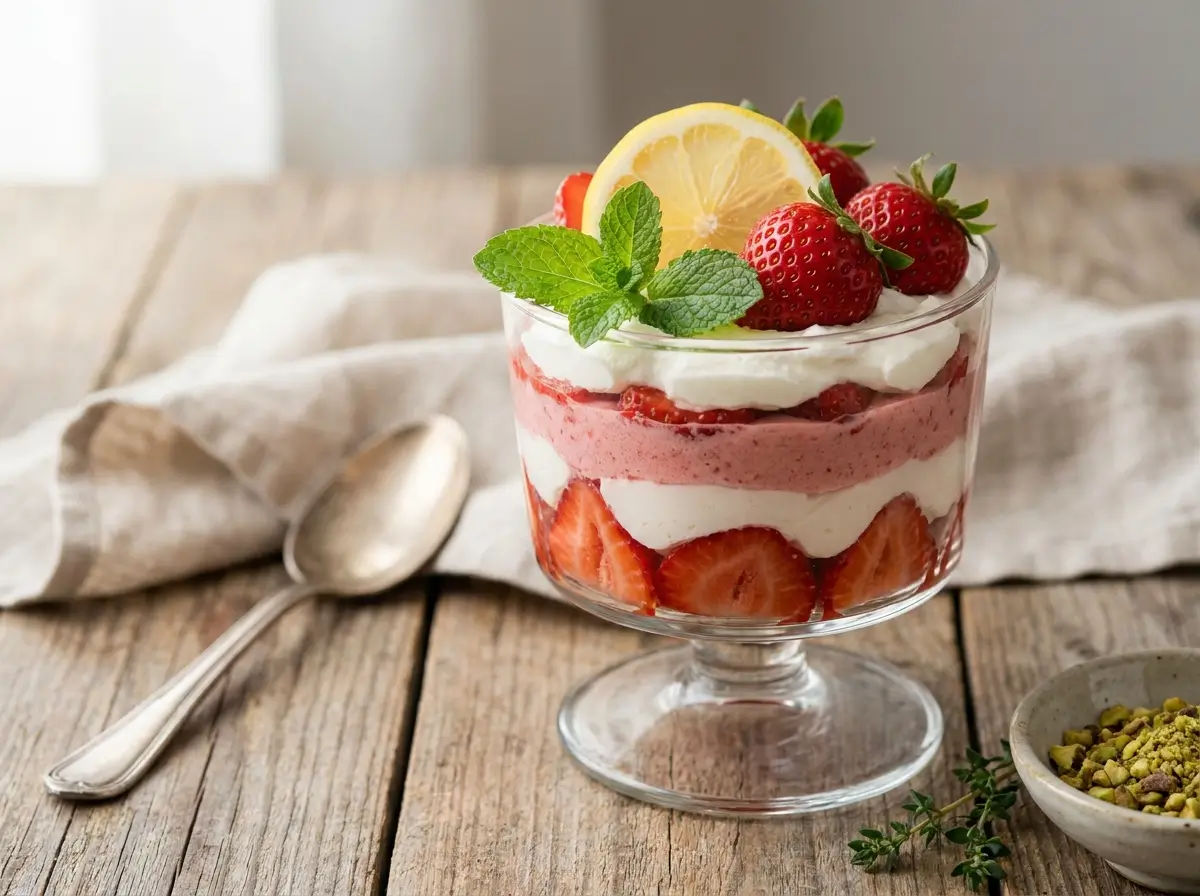
The Best Easy Strawberry Dream Dessert (No-Bake Option!)
Looking for the ultimate summer treat? This Strawberry Dream Dessert is airy, lush, and comes together in 25 minutes. Perfect for potlucks with a buttery graham cracker crust and fresh berries—oven optional!
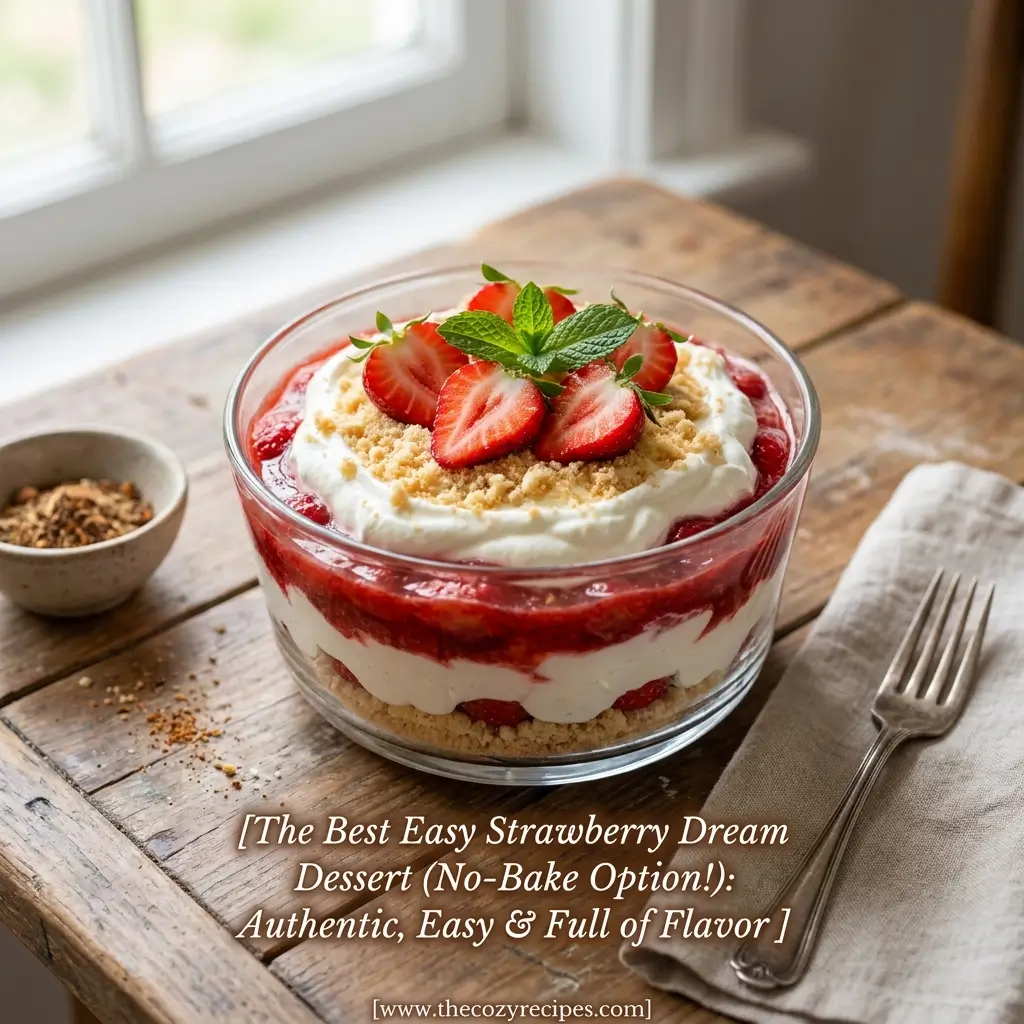
There’s a moment every summer when the heat gets serious and the idea of turning on your oven feels borderline offensive. That’s exactly when this No-Bake Strawberry Dream Dessert earns its place at the table — cool, creamy, and barely any effort to pull together.
I first made a version of this years ago when someone brought its tropical cousin, the Pineapple Dream Dessert, to a neighborhood cookout. The texture stopped me mid-bite — that rare combination of airy and rich that somehow feels indulgent without being heavy. I knew immediately a strawberry version needed to exist. After a lot of tweaking (and a lot of taste-testing, no complaints there), this is the recipe I’ve been making ever since.
It’s become a go-to for potlucks, backyard BBQs, and those lazy Sunday afternoons when you want something special without the production. The layers are gorgeous in the pan, the flavor is bright and fresh, and you’ll have it in the fridge and ready to chill in about 25 minutes flat.
Recipe Snapshot
| Prep Time | 25 minutes |
| Chill Time | 4 hours to overnight |
| Difficulty | Easy — total beginner friendly |
| Servings | 12 |
| Key Feature | Baked or No-Bake crust options |
What You’ll Need — And Why It Matters
Good ingredients make good food. Simple as that. Here’s what goes into this dessert and the honest tips that make a real difference.
The Crust
You’ll need graham cracker crumbs and melted butter. That’s it. The ratio is what gives you a crust that holds together when you slice it without turning into a sandcastle at room temperature.
Don’t have a food processor? No problem — and honestly, I rarely bother with one for this. Toss your graham crackers into a zip-lock bag, seal it, and roll over them with a rolling pin. It takes two minutes and the cleanup is almost nonexistent. Aim for fine crumbs with just a few small chunks for texture.
The Strawberries
This is where I’ll be firm with you: use fresh strawberries. Plump, ripe, deeply red ones. Frozen berries release too much liquid as they thaw, and that extra moisture will work against your filling, making it looser than you want. If fresh berries aren’t in season, wait for this recipe — it’s worth it.
When it comes to prep, resist the urge to fully blend the strawberries into a smooth purée. Pulse them just a few times in a blender or food processor. You want a mix of juice and soft chunks. That uneven texture is what gives every bite its fresh, jammy quality rather than tasting like flavored mousse.
The Cream Cheese Filling
One rule, no exceptions: your cream cheese must be fully softened to room temperature before you start. Take it out of the fridge at least an hour ahead. Cold cream cheese will clump the moment it hits the other ingredients, and no amount of mixing will smooth it back out. A properly softened block blends into something satiny and smooth that makes the whole dessert feel luxurious.
Step-by-Step Instructions
Step 1: Make the Crust (Your Choice)
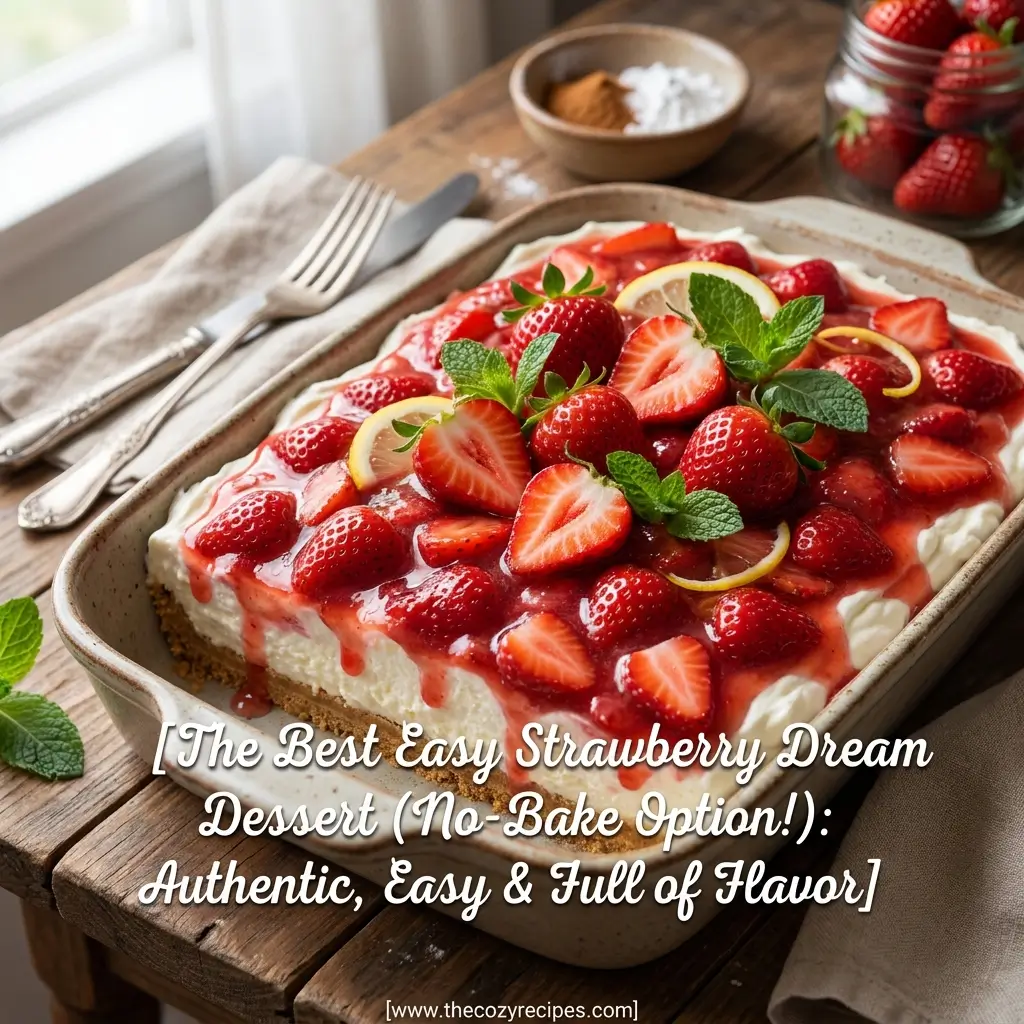
Option A — Baked Crust: Mix your graham cracker crumbs with melted butter, press firmly into a 9×13 pan, and bake at 300°F for 8–10 minutes. This gives the crust a deeper, toasted flavor — almost nutty — and it holds up a little firmer when sliced. Let it cool completely before adding any filling.
Option B — No-Bake Crust: Same process, but instead of the oven, press the crust into your pan and pop it in the refrigerator for 20 minutes. The cold butter firms up and binds everything together. Lighter flavor, but still delicious and completely oven-free.
Step 2: Pulse the Strawberries
Hull and halve your strawberries, then add them to a blender or food processor. Pulse 3–4 times — no more. You’re looking for chunky and juicy, not smooth. Set aside.
Step 3: Make the Cream Cheese Layer
Beat your softened cream cheese, softened butter, and powdered sugar together until completely smooth and fluffy. This is your base, and it should look like the world’s most elegant frosting before anything else goes in.
Step 4: Layer It All Together
Fold the pulsed strawberries into your cream cheese mixture gently — you want streaks and swirls, not a uniform pink blend. Then fold in your Cool Whip in two additions, keeping as much air in the mixture as possible. Spread this over your chilled or cooled crust in an even layer.
Step 5: Garnish and Chill
Reserve a small handful of graham cracker crumbs to scatter over the top — it adds a lovely visual contrast and a little textural crunch in every bite. Add a few sliced fresh strawberries as garnish if you like. Cover the pan with a lid or plastic wrap and refrigerate for at least 4 hours, though overnight is even better.
Creative Variations Worth Trying
Mini Dessert Cups: Layer everything into 8 oz clear plastic cups for individual servings. They look impressive at parties, travel easily, and guests love having their own portion. No serving utensils required.
The Strawberry Shortcake Twist: Swap the graham crackers for Vanilla Wafers. The flavor shifts toward a classic strawberry shortcake profile — a little sweeter, a little more nostalgic. Kids go absolutely wild for this version.
Homemade Whipped Topping: If you prefer to skip the store-bought Cool Whip, stabilized whipped cream works beautifully. Just add a capful of strawberry extract to your cream as you whip it for an extra pop of flavor that ties the whole dessert together.
Make-Ahead, Storage & Freezing
Make-Ahead: This dessert is a meal-planner’s dream. Assemble it up to 24 hours in advance and refrigerate. One tip — hold off on the fresh strawberry garnish until about an hour before serving. Strawberries sitting on top overnight tend to look a little tired and dried out by the time the pan hits the table.
Refrigerator Storage: Covered tightly, this keeps well for up to 4 days. The flavor actually deepens a little by day two, if it lasts that long.
Freezing: To freeze individual slices, place cut portions on a parchment-lined baking sheet and freeze for 2 hours until solid — this “flash freeze” keeps the layers intact. Then transfer to a freezer bag or airtight container for up to 6 weeks. Thaw individual slices in the refrigerator for a couple of hours before serving.
Printable Recipe Card
Course: Dessert | Cuisine: American | Servings: 12 | Calories: ~355 per slice
Ingredients
Crust
- 2 cups graham cracker crumbs
- ½ cup melted butter
Filling
- 2 cups fresh strawberries, hulled
- 8 oz cream cheese, fully softened
- ¼ cup butter, softened
- 1 cup powdered sugar
- 8 oz Cool Whip (or stabilized whipped cream)
Optional Garnish
- Reserved graham cracker crumbs
- Fresh sliced strawberries
Nutrition Per Slice (approximate)
Calories: 355 | Fat: 22g | Carbohydrates: 36g | Sugar: 24g | Protein: 3g
A Note From the Kitchen
Amanda has spent over 30 years developing recipes that real people actually make — no fancy equipment, no obscure ingredients, just honest food that tastes like it took more effort than it did. This Strawberry Dream Dessert is a perfect example of that philosophy: approachable enough for a weeknight, impressive enough for a crowd.
If you loved this recipe, come join the newsletter for fresh recipes delivered daily. Or tune into Dish-cussions, the video podcast where food gets talked about the way it deserves — with a little humor and a lot of heart.
Drop a comment below and let us know how yours turned out — did you go baked or no-bake?
Leave a Comment & Rate this Recipe!
If you love this recipe, please consider giving it a star rating when you leave a comment. Star ratings help people discover my recipes online. Your support means a lot to me, I appreciate you.
There are no reviews yet. Be the first one to write one.